Zero-Downtime Migration from Laravel Vapor to Laravel Cloud
Move your Laravel API from Vapor to Cloud in phases, without making a complete hash of it and wishing you never bothered.

For Laravel PHP users, Laravel Vapor was the hottest new serverless hosting experience and we were all very excited. Over time the excitement around serverless for APIs seems to have died down, and a more regular hosting experience has popped up to replace it: Laravel Cloud. No longer serverless, and a whole lot more functionality baked in ready to go. So, how to migrate over without breaking everything?
Step 1: Sign up on Laravel Cloud
Create an account, it's free and does not take long.
Make an Organization for your company/team (e.g. "Protect Earth").
Step 2: Create an application
Laravel Cloud links up the application to deploy, turning pushes into deployment triggers and commit messages into deployment messages.
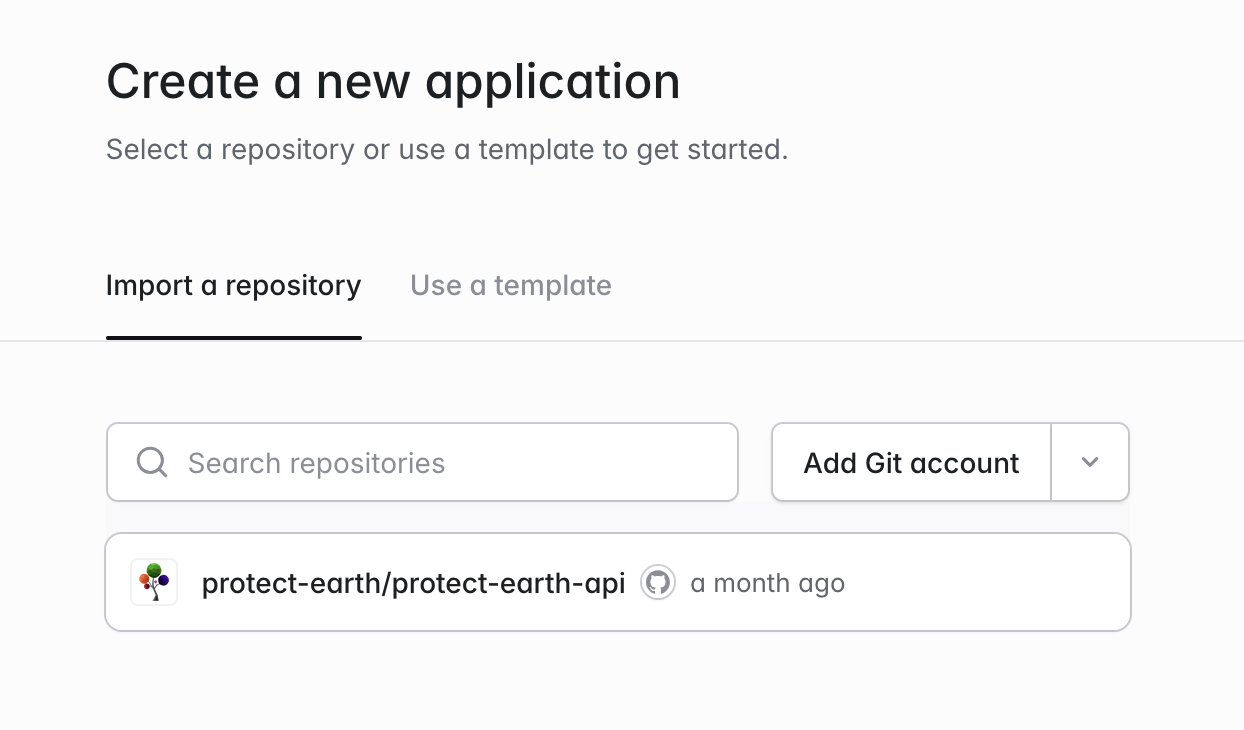
This is a lot more like other classic Platform as a Service systems (think Heroku, Netlify, Vercel, etc.) and is a lot easier than needing to run a CLI from a CI server / GitHub Action.
Once you have hooked up the application, given it a name and picked a region, you will be taken to see your new application with all its core resources being deployed.
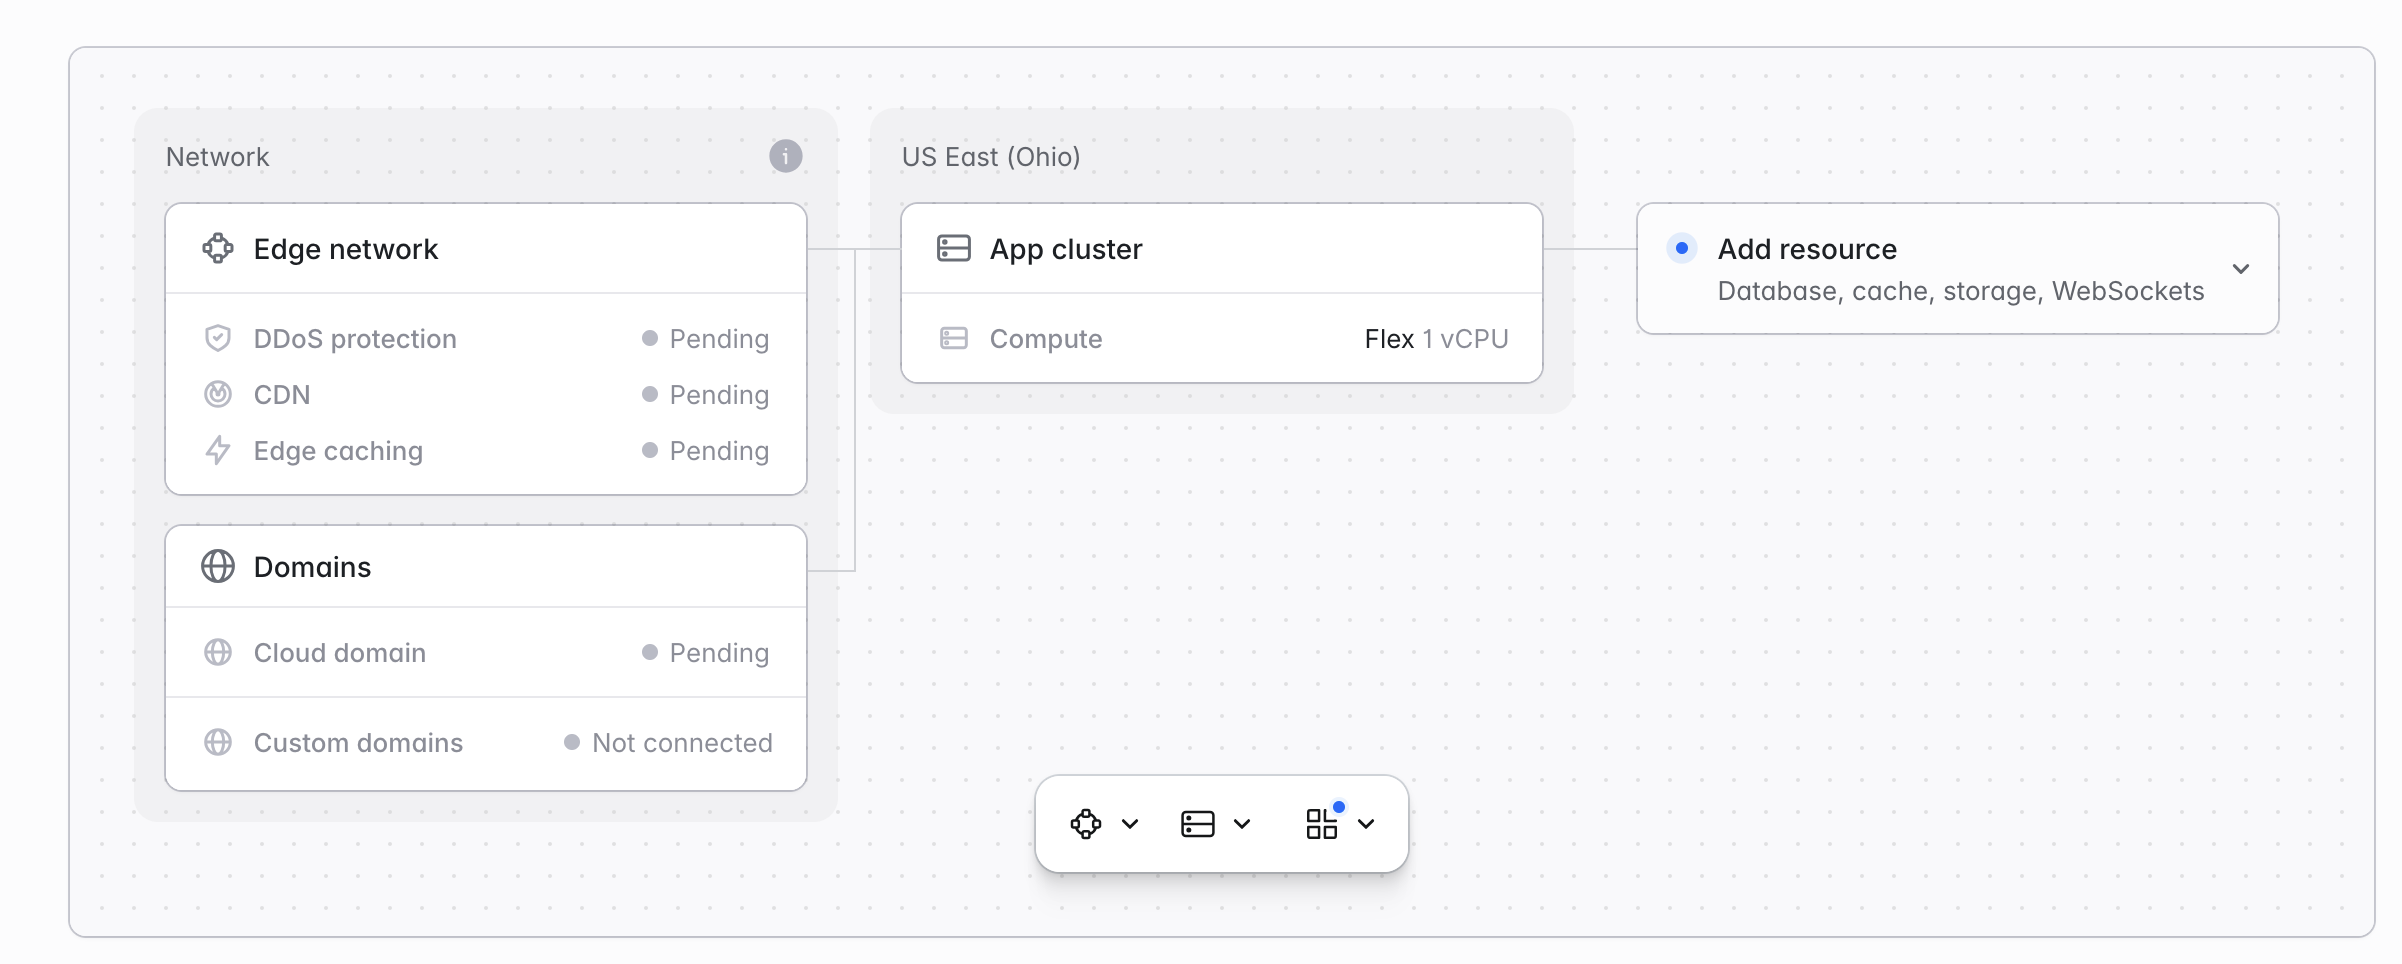
The first deployment will happen when you click the bit Deploy button, or when you push a commit. One good commit to push would be disabling Vapor deployments so we know we're only deploying to one location.
git rm .github/workflows/deploy-vapor.yaml
git commit -m "disable laravel vapor deployments"
git push origin main
That's going to keep Vapor up and running, which we'll need for a smooth transition.
Step 3: Point application to AWS RDS
The new application in Cloud is going to start up without a database, cache, websocket, or any other resources, so you can expect to see plenty of errors.
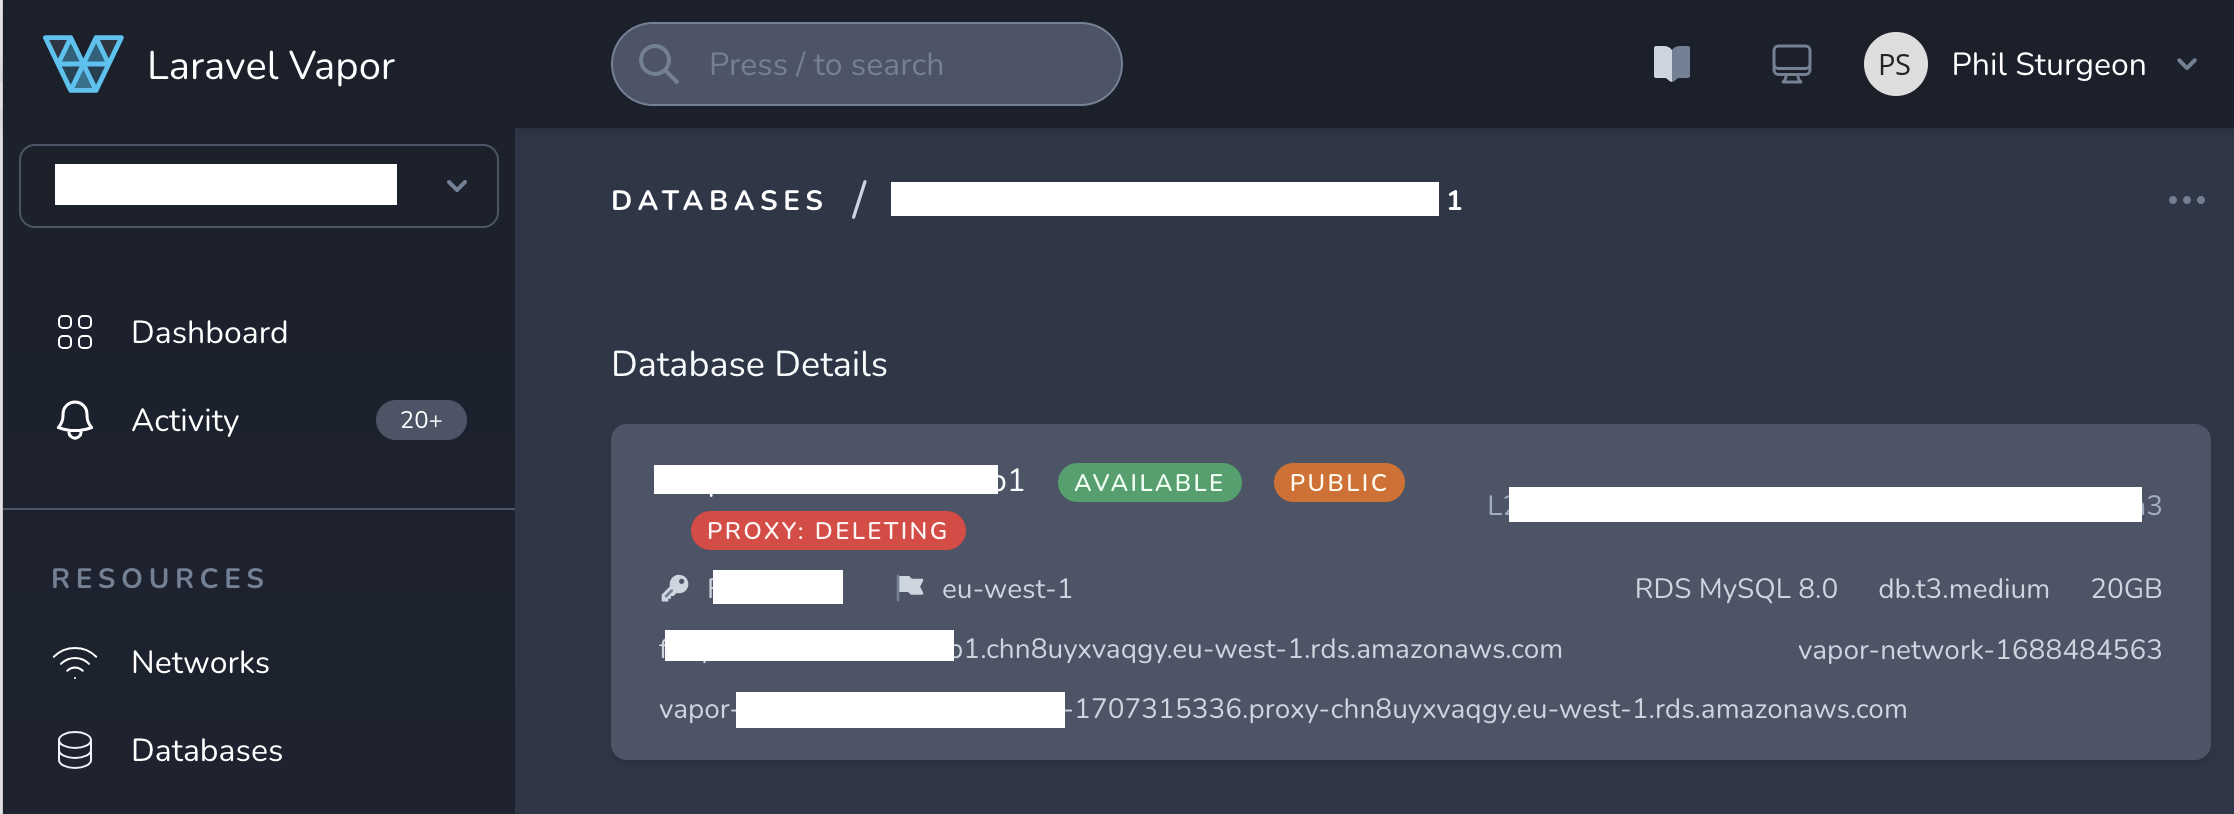
Seeing as Laravel Vapor is a thin wrapper around AWS, all of those resources can be used over the public network, so hop over to Vapor, get into the database settings, and enable public access. Now you don't need to make it public, you can do it with Vapor tunnels, but it's a whole lot easier to make it public and just delete it before you get hacked.
Vapor automatically injects username and password as environment variables, but we'll need to copy those down and paste them into Cloud environment variables in Settings to let it know where this RDS database is running.
DB_HOST={rds-db}.{rds-region}.rds.amazonaws.com
DB_PORT=3306
DB_DATABASE=vapor
DB_USERNAME=vapor
DB_PASSWORD={your-password}
To get these details, head over to the Vapor dashboard, go to Databases, and find the password behind the Show Password link. If you can connect to the database locally, you can use the exact same settings to have the Cloud application talking to it.
Pop those environment settings into the application settings, then click Save and Deploy. The application will hopefully be pulling data from the database, and you're well on your way to having a functioning application.
Step 4: Reuse AWS S3 Storage
Thousands of photos of trees. Could not migrate them all easily so pointed the application at that same bucket.
{
    "Version": "2012-10-17",
    "Statement": [
        {
            "Effect": "Allow",
            "Action": [
                "s3:PutObject",
                "s3:PutObjectAcl",
                "s3:GetObject",
                "s3:GetObjectAcl",
                "s3:DeleteObject"
            ],
            "Resource": "arn:aws:s3:::your-bucket-name/*"
        },
        {
            "Effect": "Allow",
            "Action": [
                "s3:ListBucket"
            ],
            "Resource": "arn:aws:s3:::your-bucket-name"
        }
    ]
}
Let the application know where to find the S3 bucket, and you're good to go.
FILESYSTEM_DISK=s3
AWS_ACCESS_KEY_ID=
AWS_SECRET_ACCESS_KEY=
AWS_DEFAULT_REGION=eu-west-2
AWS_BUCKET=your-bucket-name
Save and deploy, and see if images are showing up.
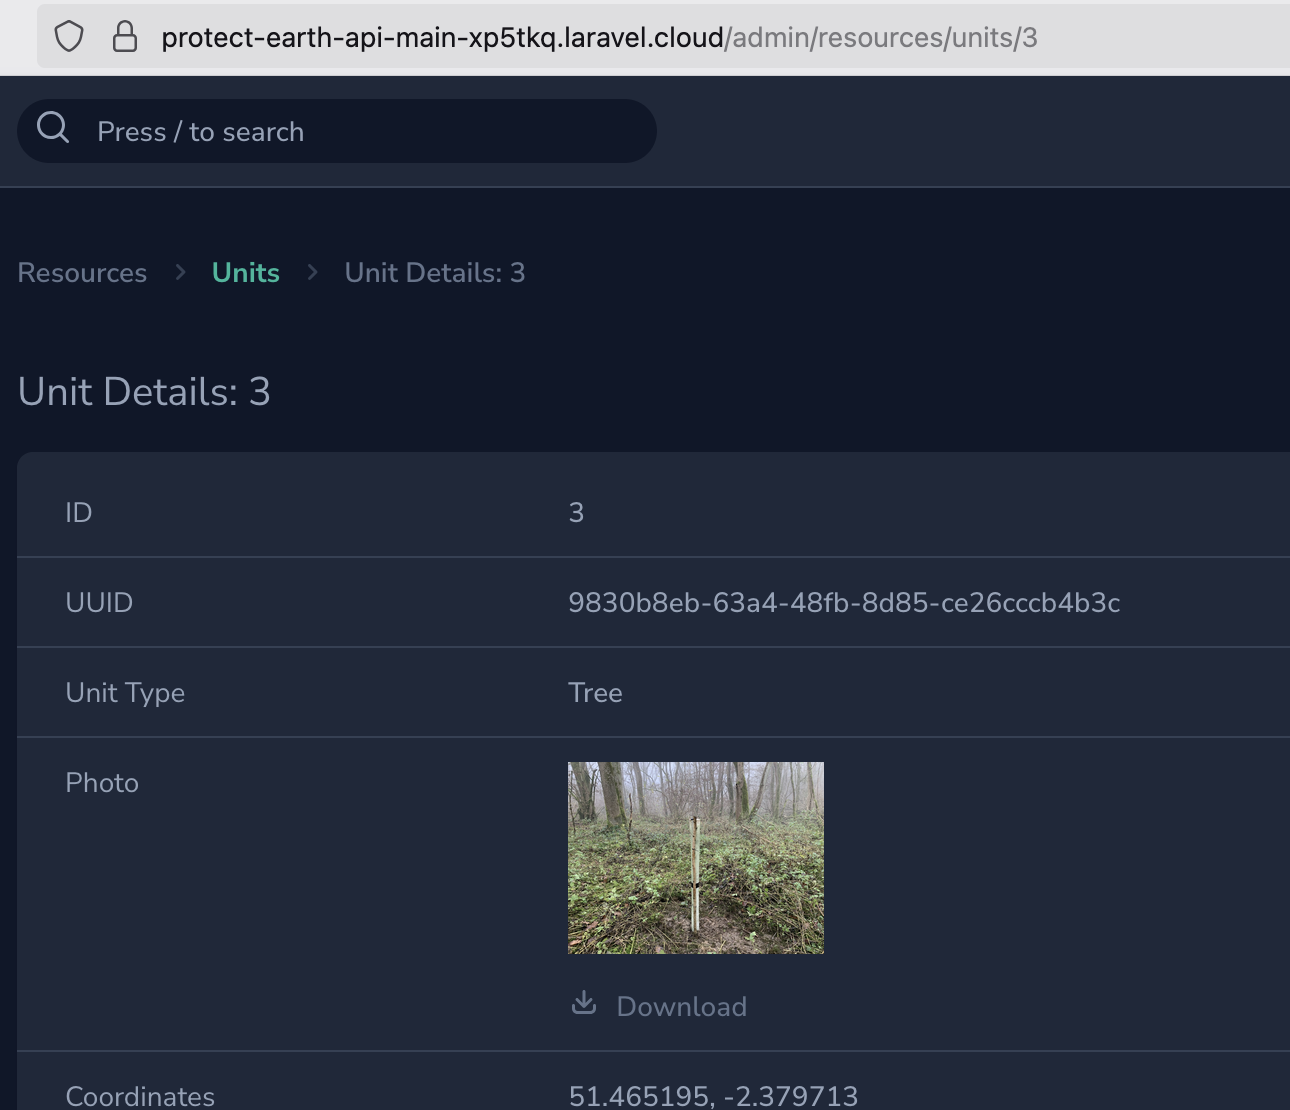
Yaaay. Hello tree.
Step 5: Setup Cache, Queues, Logs
Dwight Watson has a great post about some of the changes they needed to make getting caching, queues, and logs working during their migration. I forgot to take notes on this section since I started these migrations in August so I'm glad this post is covering that.
When you've twiddled enough of these options that you have a cache (whether its database or Laravel KV), and have a queue running (whether its on the same worker as the web application or another queue resource) it's time to give it a decent bit of testing, get QA involved if you can, and make sure its all above board before going live.
Step 6: Switch over DNS
Add the custom domain to Cloud and update DNS settings to point to it. See the Laravel Cloud documentation on custom domains.
Once this is done, give it enough time for DNS to propagate, and we can start taking down Laravel Vapor resources one at a time to start shrinking that AWS bill down to zero.
This can be done a few weeks or months later if you've got other stuff to be doing. The sooner you do it the sooner you save money but at least go for a nice walk. Ride a bike. See a goat. Come back refreshed.
Step 7: Create a new database
In Laravel Cloud create a new empty database, either MySQL or Postgres. When it creates the database do not deploy yet. Cloud will still have the DB_* environment settings pointing to RDS even if you do deploy this new database, but click "Save only" to play it safe.
The strategy for migrating the database is simple: export the old database, then import it over here. Admittedly this is not truly "zero downtime", because the second you take this dump the data is stale.
I did this late at night, knowing we were not planting any trees at midnight, and any late orders for tree sponsorships could be copied over afterwards.
Stick Vapor into maintenance mode for a few minutes as you do this, to turn off queues and workers to avoid unexpected effects happening on the old system. You could set up DB replication if you truly need zero downtime, or just go cowboy mode and do this step quickly.
Step 8: Export the old database
Exporting the database via the CLI can be hit or miss if this is your first go, but for MySQL users it should look a little something like this:
mysqldump --set-gtid-purged=OFF --single-transaction -h {rds-db}.{rds-region}.rds.amazonaws.com -P 3305 -u vapor -p vapor > dump.sql
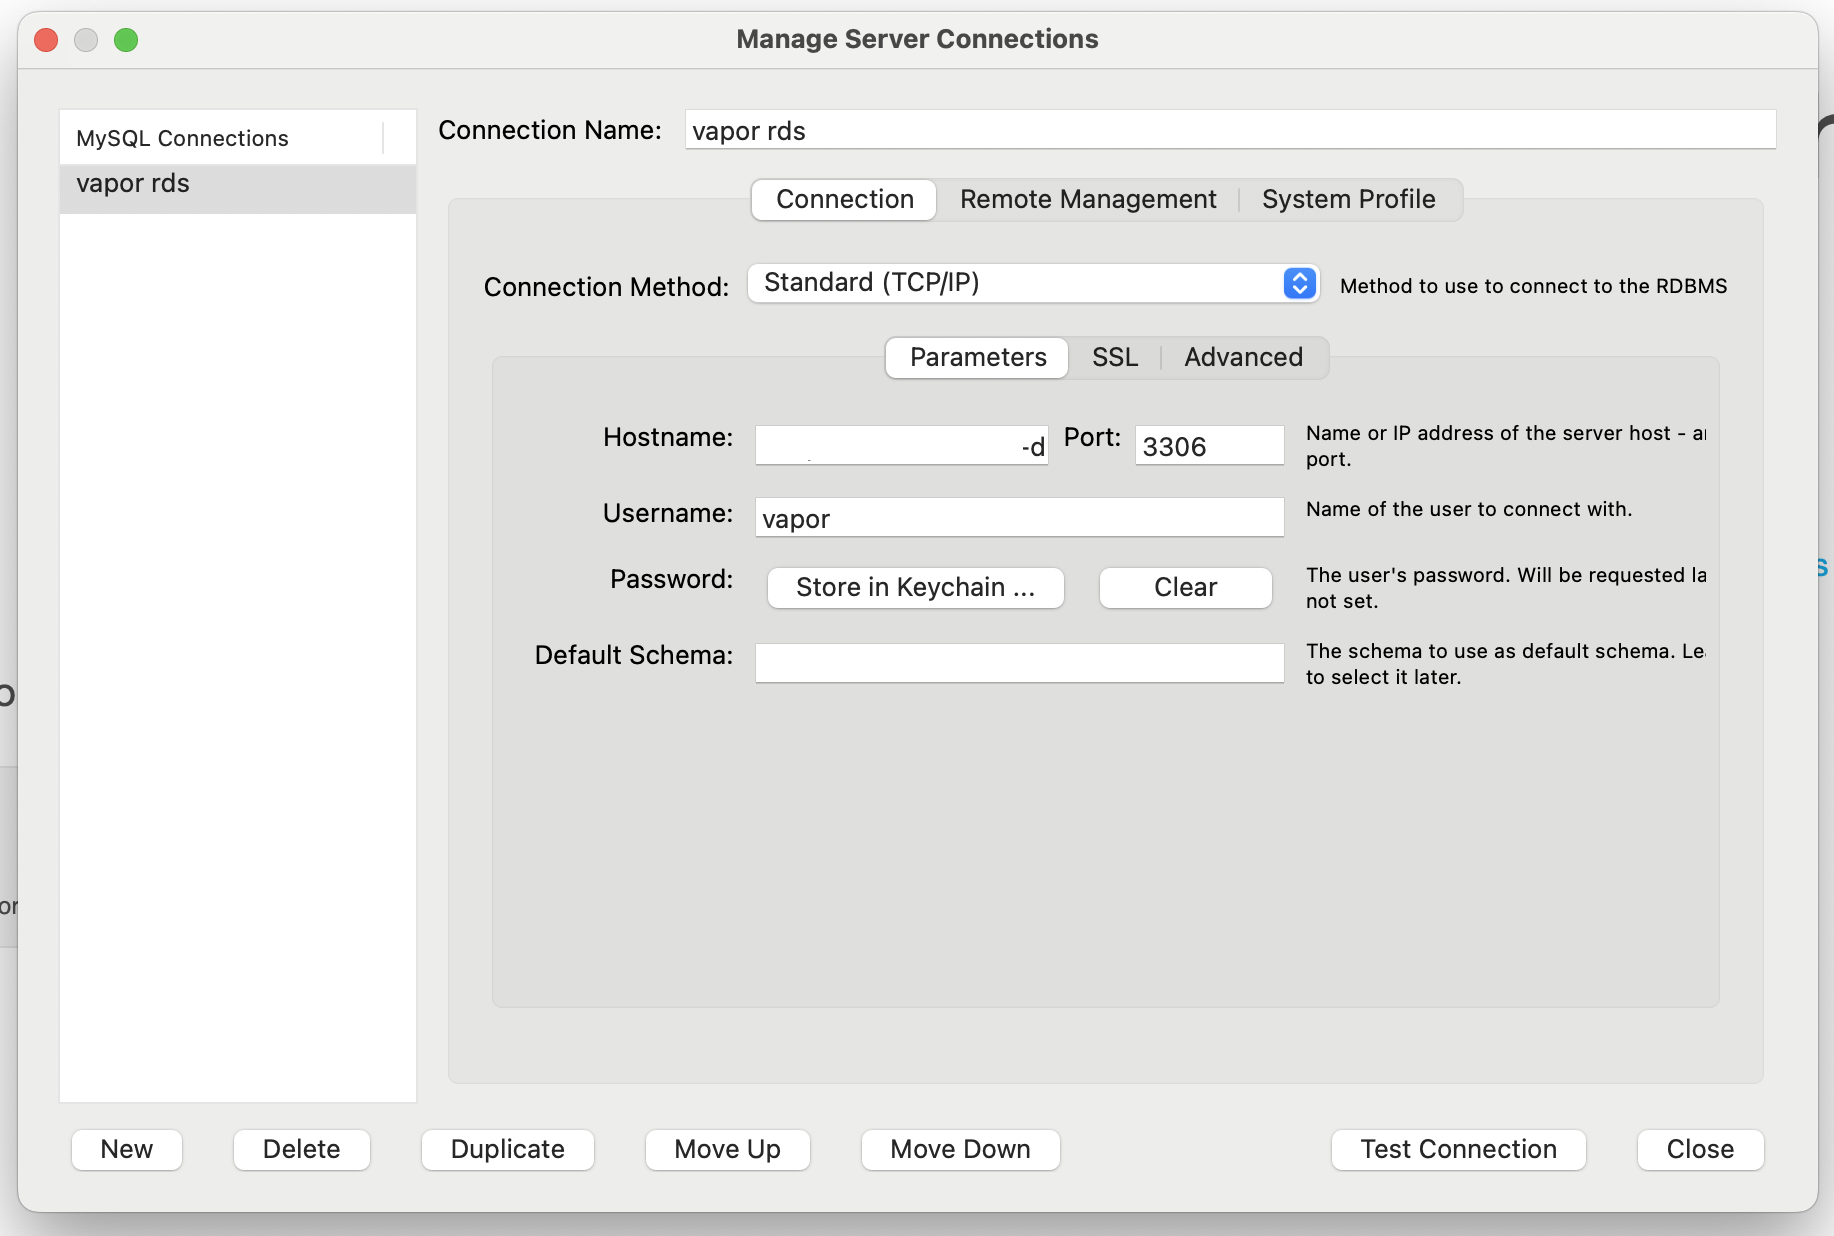
Our RDS database is MySQL so I downloaded MySQL Workbench for a bit of assistance. Connect to the old database using the same credentials pasted into Laravel Cloud.
Select every table you want to export, outputting both the table structure and the data that goes in them.
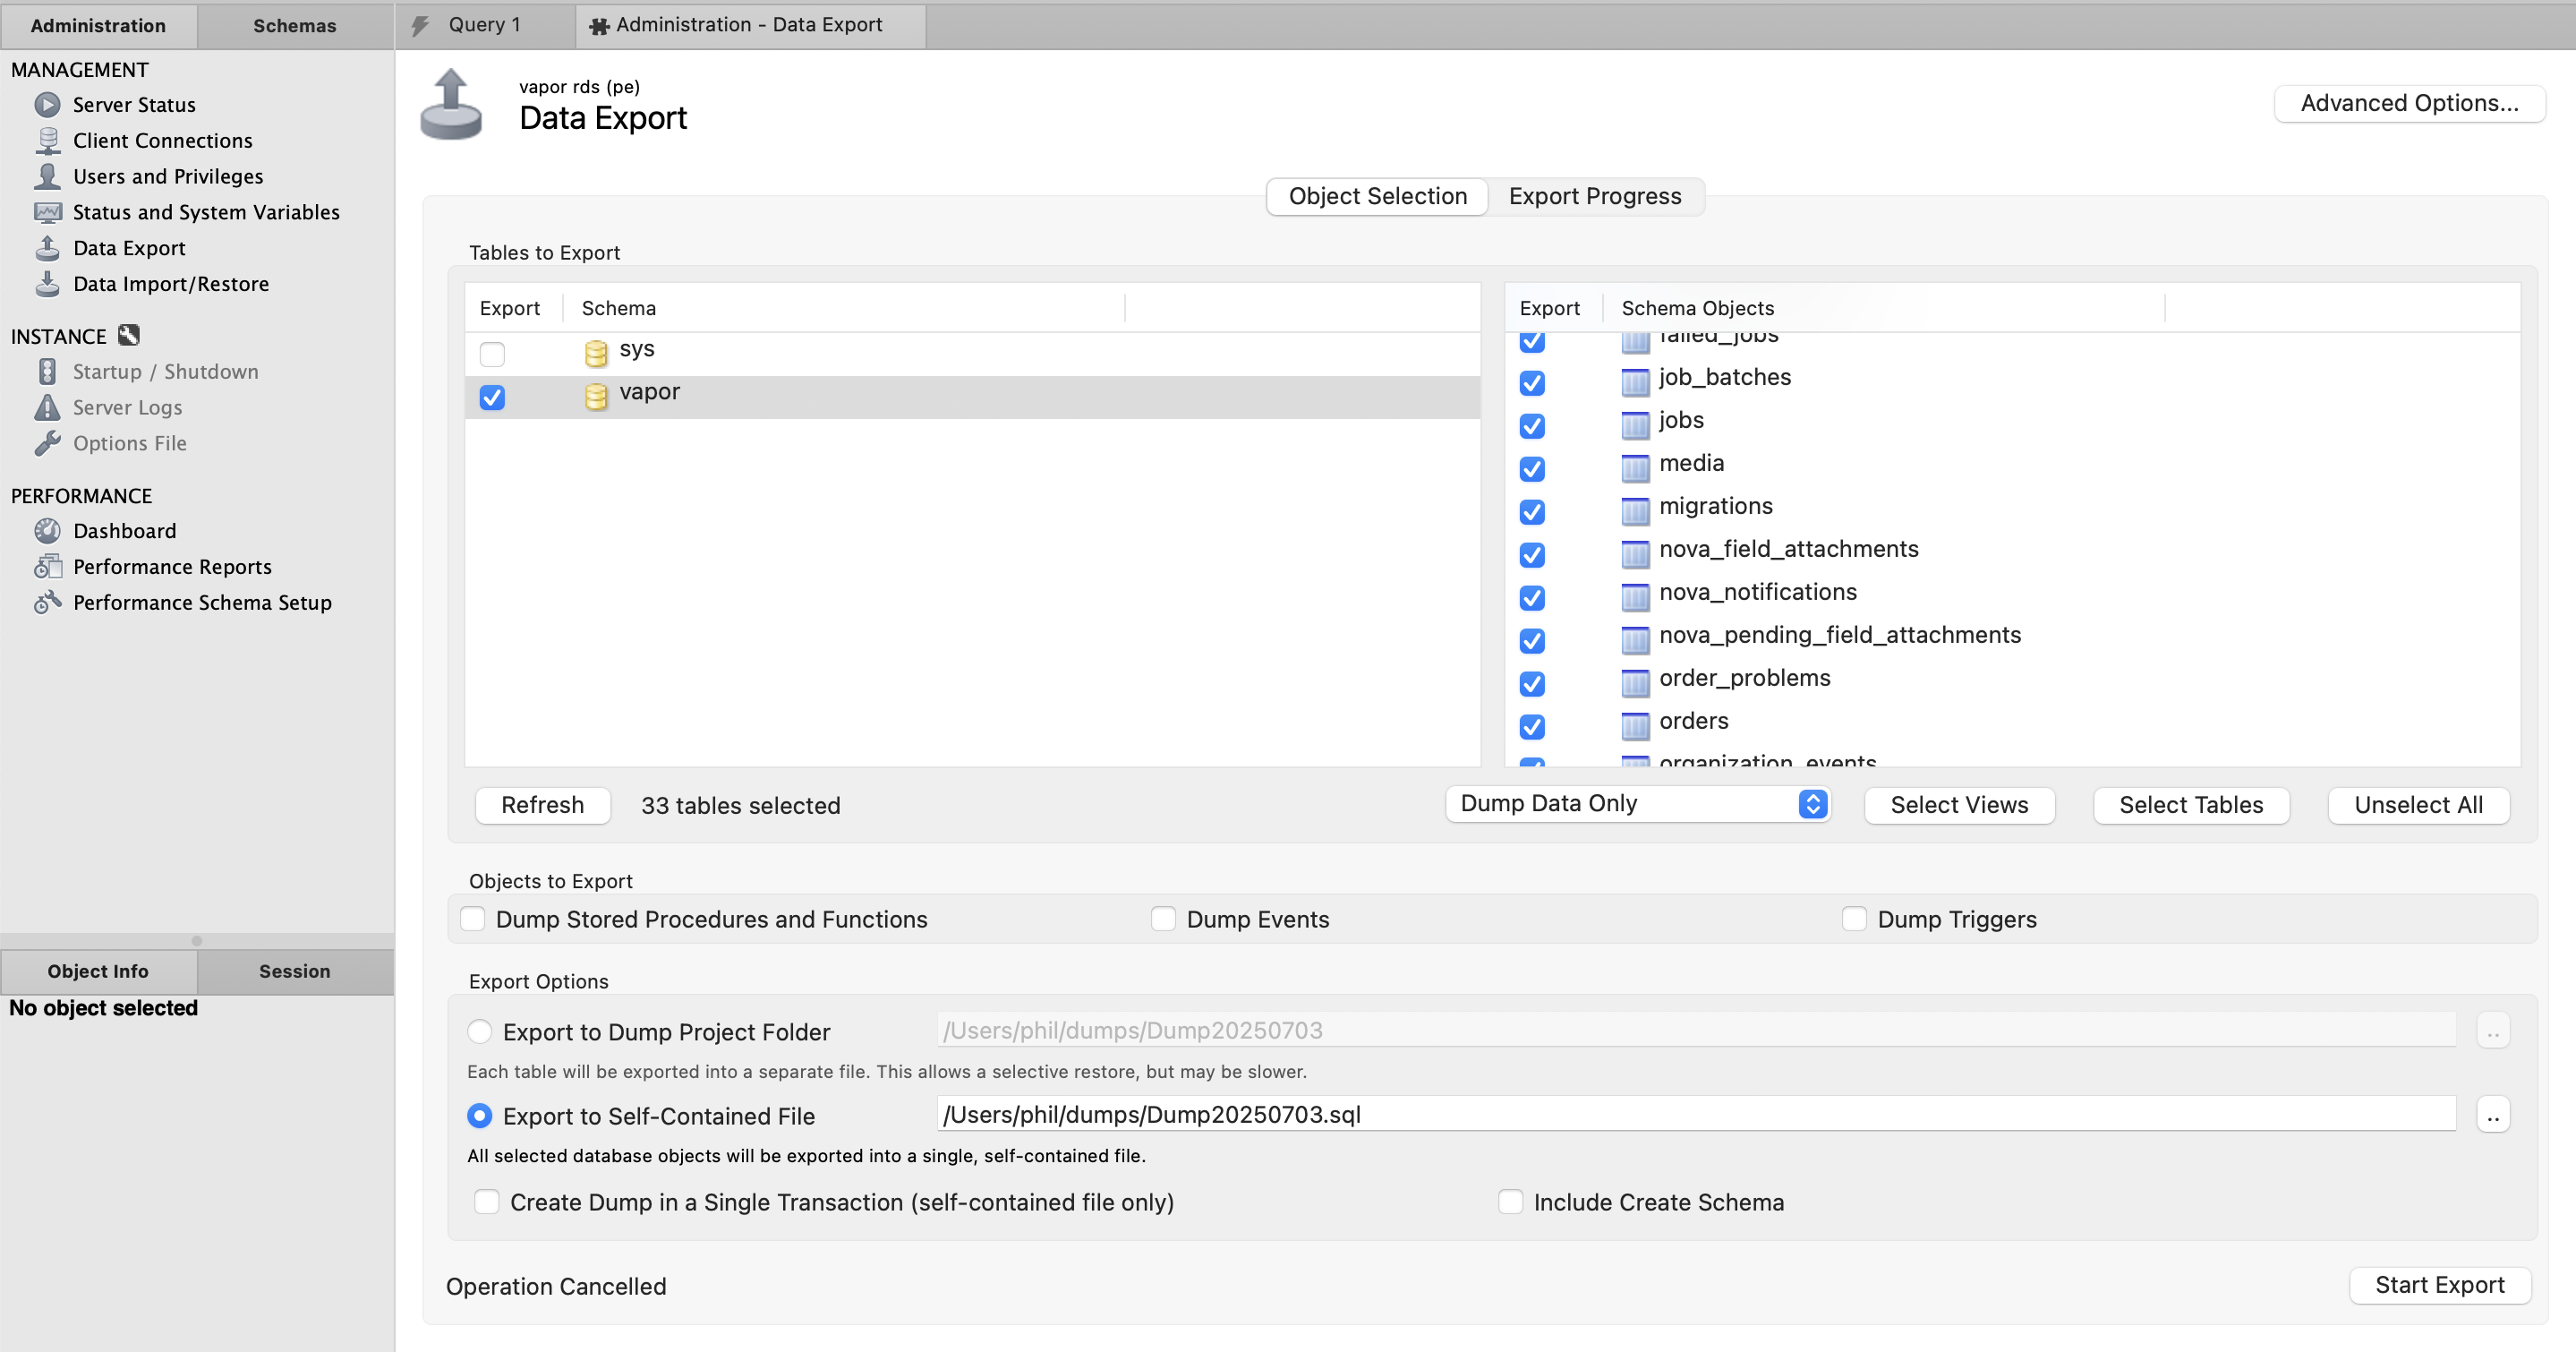
Depending on what sort of data you have, you may need to fiddle around with various settings to get it exporting smoothly. Here are the settings I've used.

As someone who uses a lot of MySQL GIS, I had to enable hex-blob to get POINT() and POLYGON() values working properly.
Step 9: Import the database dump
As soon as you have the database dump ready, import them with a command that looks a bit like this.
$ mysql --init-command="SET SESSION FOREIGN_KEY_CHECKS=0;" -P 3306 -h db-{host}.eu-west-2.public.db.laravel.cloud -u <username> -p main < dump.sql -vv
Once that's finished running, remove the hardcoded DB_* environment variables from the Cloud application that were pointing it to RDS. When these are removed, click "Save and Deploy".
Give it another round of Q&A, and take it out of maintenance mode, or go to bed.
Step 10: Migrate AWS S3 to Cloud (Cloudflare R2 kinda)
This part could take 20 minutes or two months depending on many files you have.
Laravel Vapor uses AWS S3, but Laravel Cloud uses Cloudflare R2. These services are essentially the same thing, and whilst they share the same API (Flysystem can talk to both of them) it's not possible to transfer files from one to the other in any but the slowest and daftest of ways.
Amazon S3 has all sorts of clever ways to transfer content between buckets. This won't work.
Cloudflare R2 has a bulk import tool called Super Slurper, but there's no way to use that for your managed R2 bucket.
I had awscli installed so I downloaded the whole bucket.
mkdir backup-bucket
brew install awscli
aws configure
aws s3 sync s3://<bucketname> ./backup-bucket
This will clone the entire bucket into .
This worked fine for Protect Earth as we only had 120,000 photos of trees to download, but another tree planting charity had a million and that was hecking slow.
For the upload of these files, awscli is not going to work as the authentication will be all wrong.
As a big fan of Cyberduck I cracked out their CLI utility duck and added the Cloudflare R2 profile to help it quick the right language.
mv "~/Downloads/Cloudflare R2 Storage \(S3\).cyberduckprofile" "~/Library/Group Containers/G69SCX94XU.duck/Library/Application Support/duck/"
In the Cloud dashboard create and attach a new object storage. Name it whatever, and attach it to production with another name which could be whatever. I named both cloud.
Create an access token for that bucket called duck upload or something, and we can use this to import the files.
Click "View Credentials" on the Cloud dashboard and you'll see a bunch of AWS_* environment variables, even though this is for R2.
AWS_BUCKET=fls-f8efy7-b2e6-49db-b13e-d1bf4c342bcf
AWS_DEFAULT_REGION=auto
AWS_ENDPOINT=https://numbers-and-letters.r2.cloudflarestorage.com
AWS_URL=https://fls-9fae57b9-b1e4-47db-b43e-c1bf4c342bcd.laravel.cloud
AWS_ACCESS_KEY_ID=id
AWS_SECRET_ACCESS_KEY=secret
As far as duck is concerned, the access key will be the username, and the secret will be the password.
For the host look for AWS_ENDPOINT=. Grab the whole value, and cut off the https:// part. So if it was https://example.r2.cloudflarestorage.com we just want example.r2.cloudflarestorage.com.
Then add the AWS_BUCKET value after it, so if your bucket was my-bucket you'd end up with example.r2.cloudflarestorage.com/my-bucket.
Now you can use the duck command to upload your files:
duck --verbose --retry --parallel --username {AWS_ACCESS_KEY_ID} --password {AWS_SECRET_ACCESS_KEY} --upload s3-cloudflare-r2://<hostname>.r2.cloudflarestorage.com/fls-f8efy7-b2e6-49db-b13e-d1bf4c342bcf/ ./backup-bucket/
this may take forever, and you might want to run it from a server, a raspberry pi, or some other always on device so it doesn't cancel every time you move anywhere for the new few months, but no dramas if it does cancel.
Run duck again with --existing skip and it'll upload missing files, even doing a md5 checksum to make sure there were no broken uploads. You can skip the md5 if thats too slow by using --nochecksum.
Finally
Now you can delete whatever bits of Laravel Vapor you've not already turned off.
Wipe out AWS RDS, all the databases, proxies, and snapshots. Do as much of it as you can through the Laravel Vapor interface to reduce clicking around.
Remove all the images from all of the S3 bucket your user files were stored in and everything with vapor in the name too.
Close down all the queues, remove any remaining Lambdas, and eventually you should be able to close down your AWS account entirely, and then close your Laravel Vapor account too.
How is Laravel Cloud
Generally I'm a big fan. My charity Protect Earth is down from $120/month to $30/month and performance is better thanks to built in support for Laravel Octane.
Most importantly for API developers, Laravel Cloud has network caching enabled by default, helping you focus on designing APIs to more cacheable without needing to faff around setting up the mechanics yourself like you did with Vapor.
Finally the built in support for Laravel Nightwatch has provided a lot of the same use-cases covered by Sentry, but with one less price tag to drain the charity coffers.
Let me know how the migration goes, and if you get stuck along the way I can help you out. Drop a comment with improvements or feedback if I've missed anything!